
When a cherished ceramic piece shatters, it doesn’t have to be the end of its story. Enter the art of traditional Japanese Kintsugi repair, a centuries-old craft that restores broken pottery using real Urushi lacquer and pure gold powder. Rooted in the Zen philosophy of Wabi-Sabi, Kintsugi embraces imperfections, transforming cracks into stunning, luminous veins of history rather than hiding them. While modern, quick-curing epoxy methods exist, mastering authentic Urushi lacquer Kintsugi offers unmatched durability, food safety, and a profound sense of mindfulness. This comprehensive beginner’s guide covers everything you need to know about doing Kintsugi at home. From selecting the right authentic Japanese Kintsugi repair kit to mastering the four essential steps—from the initial Mugi-Urushi adhesion to the final Makie gold dusting—you will learn how to breathe breathtaking new life into your broken wares through sustainable, heritage craftsmanship.
Watch a favorite bowl slip from your hands and crack against the floor, and you may instinctively reach for the trash. But traditional Japanese Kintsugi repair asks something different of us: to see that moment not as an ending, but as the opening chapter of an even richer history. In an era calling for sustainable living and mindful consumption, Kintsugi is drawing passionate interest from craftspeople, collectors, and creatives worldwide.
Before diving in, here are the three most important takeaways from this guide:
- Choosing Your Method: Kintsugi comes in two primary forms — traditional Urushi lacquer Kintsugi, which is food-safe and built to last, and modern epoxy-based Kintsugi, which cures quickly but is best reserved for decorative pieces. Understanding the difference is the first step to a successful repair.
- The Core Process: Authentic Urushi Kintsugi follows four essential stages: (1) bonding the broken pieces, (2) filling gaps and chips, (3) applying lacquer layers as a base, and (4) dusting with gold powder. Each stage requires proper curing in a humid environment (room temperature above 20°C / 68°F, humidity above 70%).
- Safety First: For any piece that will hold food or drink, use only natural Urushi lacquer and pure gold or silver powder. Always wear nitrile gloves and long sleeves during application, as raw Urushi can cause an allergic skin reaction known as Urushi Rash.
Working slowly with broken ceramics is a meditative, deeply mindful experience. This guide distills the essentials of this quiet, heritage craft for those who are serious about doing it right.
Table of Contents
What Is Kintsugi? The Philosophy of Sustainable Beauty
Kintsugi — literally “golden joinery” — is far more than a repair technique. It is a philosophy made visible. Rather than disguising damage, Kintsugi honors it, tracing each crack and chip with gold, silver, or platinum to declare: this piece has a history, and that history has value. What sets traditional Japanese Kintsugi repair apart from any other restoration art is its radical insistence that the mended object becomes more beautiful, more meaningful, than it was before it broke.
Wabi-Sabi Philosophy: Finding Beauty in Imperfection
At the heart of Kintsugi lies the deeply Japanese aesthetic concept of Wabi-Sabi — a worldview that finds profound beauty not in perfection, but in transience, asymmetry, and the graceful passage of time. Where Western aesthetics have historically prized flawlessness, Wabi-Sabi philosophy celebrates the worn, the weathered, and the repaired. A Kintsugi-restored bowl, with its gilded seams catching the light, is considered more precious than an unblemished one, because it carries lived experience within its form. As sustainability and slow living move to the center of global culture, the resonance of this philosophy has never felt more timely.
Food-Safe Kintsugi Epoxy vs. Authentic Urushi Lacquer: Which Should You Choose?
The first decision every aspiring practitioner must make is which method to use. Traditional Urushi lacquer Kintsugi uses the natural sap of the Toxicodendron vernicifluum (lacquer tree), a material refined by Japanese artisans for over a thousand years. It takes longer to cure than synthetic alternatives, but fully hardened Urushi is remarkably tough, producing a repair that can genuinely withstand daily use. For tableware you plan to eat and drink from, authentic Urushi with pure gold or silver powder is the gold standard — both literally and figuratively.
Modern epoxy-based Kintsugi, on the other hand, cures within hours and is accessible to complete beginners. However, it raises legitimate concerns around food safety, heat resistance, and long-term durability. Most experts recommend reserving epoxy Kintsugi for purely decorative objects — vases, ornaments, display pieces — rather than functional tableware.
This guide focuses exclusively on authentic Urushi lacquer Kintsugi. It is the more demanding path, but also the one that yields a truly lasting, food-safe, and culturally authentic result — a skill, once learned, that stays with you for life.
Essential Kintsugi Tools and Materials: How to Choose What You Need
In traditional Japanese Kintsugi repair, your tools and materials are not an afterthought — they are the craft itself. You do not need to equip yourself like a professional lacquerware workshop from day one, but the quality of your core materials will directly determine the quality, safety, and longevity of your finished repair.
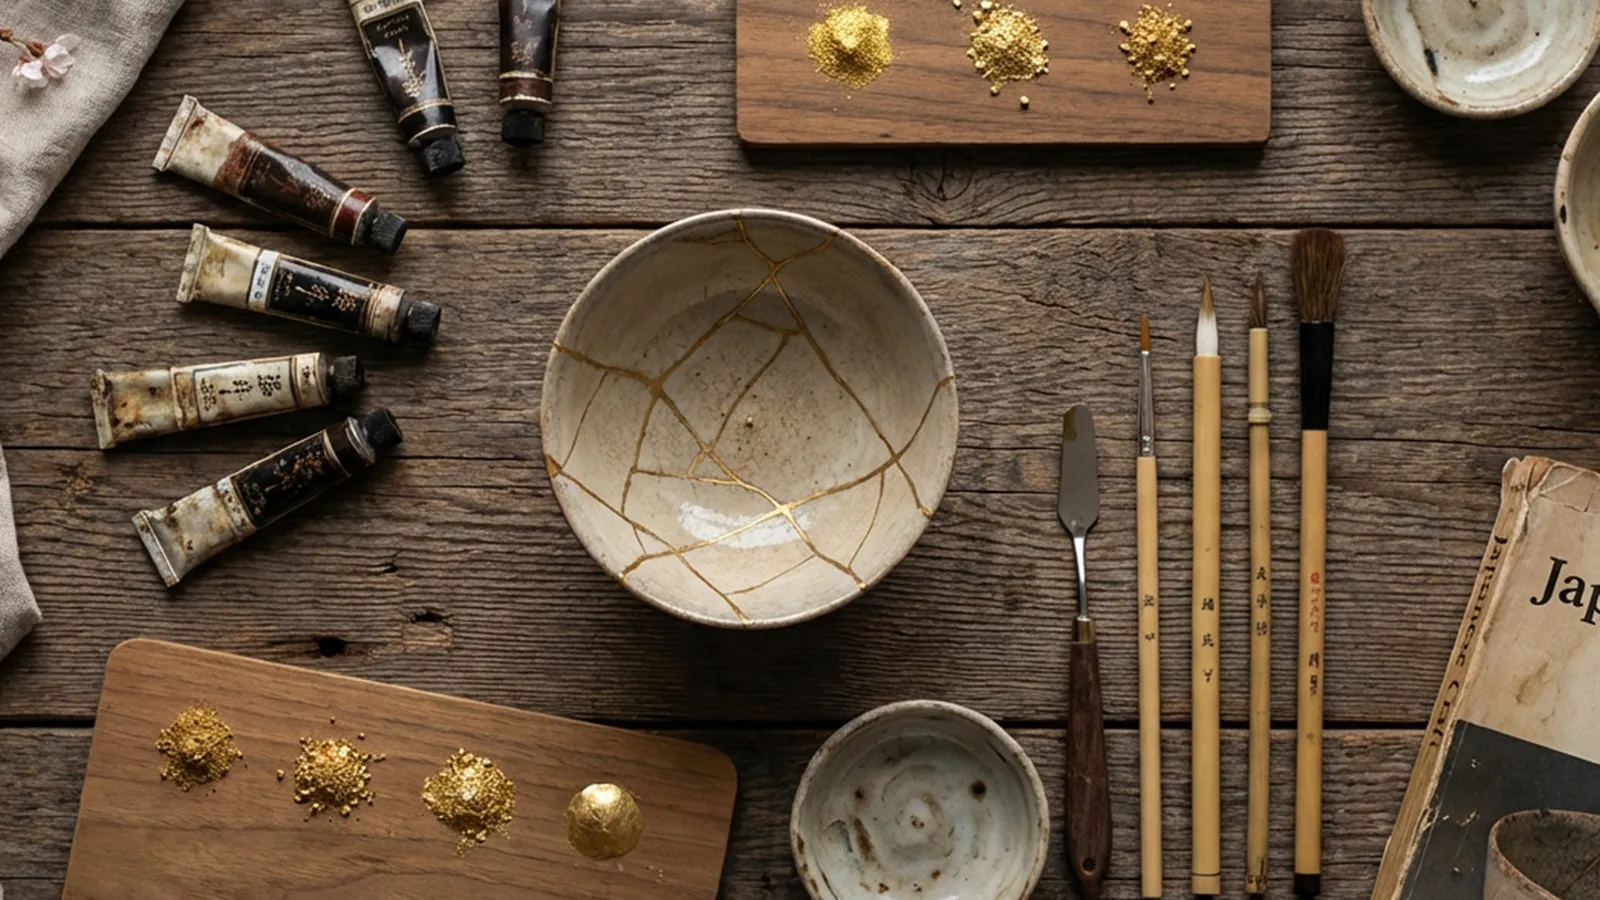
Core Materials: Urushi, Gold Powder, Brushes, and More
Authentic Kintsugi relies on a set of natural, time-tested materials, each with a specific role in the process:
- Raw Urushi (Ki-Urushi): Unrefined natural lacquer sap, used as the base adhesive and for building the repair layers. This is the foundational material of the entire process.
- Black Lacquer & Red Bengara Lacquer (Kuro-Urushi / Bengara-Urushi): Colored lacquers applied as finishing base coats to create a rich ground for the gold powder.
- Wood Powder (Mokufun) & Tonoko Stone Powder: Mixed with lacquer to create natural repair putties — Kokuso for deep chips and Sabi for fine surface imperfections. Tonoko is a fine powder derived from ground whetstone, a traditional Japanese material with excellent filling properties.
- Pure Gold Powder (Jun-Kin-Fun) / Makie Powder: The decorative finale. For any piece intended for food use, only pure gold, pure silver, or similarly food-safe metal powders should be used — never alloys or synthetic alternatives.
- Makie Brush & Powder Application Brush: Specialist brushes for applying thin, precise lines of lacquer and for gently dusting the gold powder onto the still-tacky surface.
Additional supplies you will need include masking tape, wet-and-dry sandpaper (various grits), a glass mixing palette, and nitrile gloves.
The Best Kintsugi Repair Kit for Beginners: What to Look For
Sourcing each material individually can be genuinely overwhelming for a first-time practitioner — especially when it comes to identifying quality Urushi from a trustworthy supplier. A well-curated Kintsugi repair kit from a reputable Japanese specialist is the most practical and reliable starting point.
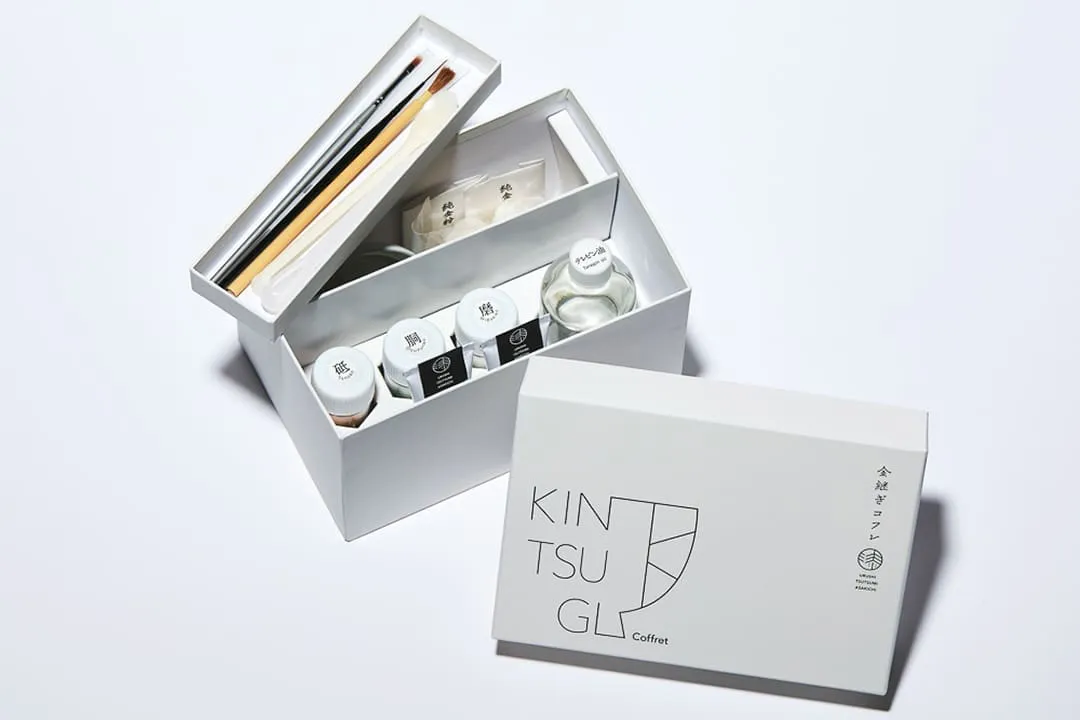
One standout example is Tsutsumi Asakichi Urushi, a Kyoto-based lacquer house with roots stretching back to the Meiji era (late 19th century). Long celebrated among Japan’s professional lacquerware community for the purity and consistency of their Urushi, they have developed a dedicated Kintsugi DIY kit that brings the same material standards to home practitioners. Choosing a kit from a heritage supplier like this removes the guesswork around material quality — and gives you the confidence that what you are working with is the real thing.
How to Do Kintsugi at Home: 4 Essential DIY Steps
With your materials assembled, it is time to begin. The single most important mindset shift for mastering authentic Urushi Kintsugi is this: patience is the technique. Each stage must cure fully before you move to the next. Rushing will compromise both the structural integrity and the visual refinement of the final piece. Here are the four foundational steps of traditional Japanese Kintsugi repair.
Step 1: Bonding the Broken Pieces with Mugi-Urushi Adhesive
The first step is rejoining the fractured fragments. You will prepare a natural adhesive called Mugi-Urushi — made by kneading a small amount of wheat flour with water into a smooth paste, then blending in raw Urushi lacquer. Apply a thin, even coat of Mugi-Urushi to the broken edges, carefully press the pieces together, and secure them with masking tape. The bonded piece must then rest in a dedicated curing environment (described below in the troubleshooting section) until the adhesive has fully set. Cure times will vary depending on the piece, the lacquer batch, and ambient conditions — never rush this stage.
Step 2: Filling Chips and Gaps with Kokuso-Urushi and Sabi-Urushi Putty
Once the bond is solid, address any chips, missing fragments, or surface irregularities. For deeper voids, build up the area with Kokuso-Urushi — a natural putty made from raw Urushi mixed with fine wood powder and a small amount of cooked rice. For shallower depressions and hairline surface imperfections, use Sabi-Urushi, a smoother putty combining raw Urushi with Tonoko stone powder. After each putty layer has cured, sand gently with wet-and-dry sandpaper to bring the filled areas flush with the surrounding surface, working with the natural contour of the ceramic.
Step 3: Layering Lacquer — Mid-Coat and Finish-Coat Application
With the surface level and smooth, you now build the lacquer layers that will give your repair its durability, water resistance, and the ideal ground for the gold powder. Apply black Urushi lacquer in thin, even coats along the repair lines, allowing each layer to cure fully before wet-sanding the surface smooth. Then, with a fine-tipped Makie brush, apply a coat of Bengara-Urushi — a warm red lacquer that enhances the depth and brilliance of gold powder applied over it. The precision of this line is what defines the character and elegance of the finished repair.
Step 4: The Makie Gold Dusting — Bringing the Kintsugi to Life
The final step is the one that transforms a repair into a work of art. Timing is everything: you must apply the gold powder while the Bengara-Urushi finish coat is still in its semi-tacky state — neither wet nor fully dry, but just adhesive enough to capture and hold the powder. Load a soft brush or a small pad of raw silk with pure gold powder and dust it gently, deliberately, along the lacquered repair lines. Remove the excess with a clean, dry brush. As the surplus falls away, the gold seams emerge — and your ceramic is reborn, its history now written in light.
Common Kintsugi Mistakes and How to Avoid Them
Working with natural materials means working with variables. Temperature, humidity, the specific characteristics of each Urushi batch, and the nature of the ceramic itself all influence the outcome. Understanding the most common stumbling blocks before you encounter them is the most efficient way to avoid wasted time and frustration.
Why Won’t My Urushi Cure? Troubleshooting Lacquer That Stays Wet
The most widespread misconception about Urushi lacquer is that it dries like paint — by releasing moisture into dry air. In reality, Urushi cures through a humidity-driven enzymatic polymerization reaction. Dry air is the enemy of Urushi. Without sufficient warmth and humidity, the lacquer will remain tacky indefinitely, and your project will stall.
The solution is to create a simple curing chamber called a Muro (literally “humidity box”). Place a damp towel or moistened sponge inside a cardboard box or sealable plastic container, set your piece inside, and close the lid. Aim for an internal environment of approximately 20–25°C (68–77°F) and 70–85% relative humidity. This modest setup reliably provides the conditions Urushi needs to cure properly at home.
How to Prevent Urushi Rash: Essential Safety Precautions
Raw Urushi lacquer contains urushiol, the same compound responsible for poison ivy reactions, and can trigger a contact allergic response — known as Urushi Rash — in sensitized individuals. Symptoms typically include redness, itching, and localized swelling at the point of contact. Importantly, sensitivity can develop after repeated exposure even in people who did not initially react.
The precautions are straightforward: always wear nitrile gloves (not latex, which can be porous) and cover your arms and torso with long sleeves and an apron throughout every working session. If Urushi makes contact with your skin, do not rub the area — blot it carefully and clean with oil or a gentle soap. If irritation develops, persists, or spreads, consult a dermatologist. These precautions are non-negotiable, especially for beginners whose sensitivity level is unknown.
How to Care for Your Kintsugi-Repaired Ceramics
A finished Kintsugi piece occupies a rare and beautiful position: it is simultaneously an everyday functional object and a singular work of craft. How you care for it will determine whether it serves you for years or decades.
The core rules are simple. Avoid the microwave and oven entirely — the thermal stress is incompatible with lacquer repair. Keep the piece out of the dishwasher, where high-pressure water jets, caustic detergents, and intense heat drying cycles will degrade both the Urushi layers and the gold powder over time. Abrasive scrubbing pads and scouring powders are equally damaging. Instead, wash by hand using a soft sponge and mild dish soap, rinse thoroughly, and dry immediately with a soft cloth. Avoid leaving the piece to soak in water for extended periods.
Treated with this straightforward care, a well-executed Kintsugi repair becomes something genuinely extraordinary: a sustainable, heirloom-quality object that carries the marks of its history and the touch of its maker — an embodiment of Wabi-Sabi philosophy in daily life.